Do Less goals
- When should I use a Do Less goal?
- What if I NEVER want to do something?
- How should I enter data for a Do Less goal?
- What happens if I never enter data?
- Why is my Do Less going up, when I want to be doing it less?
- I'm going on vacation and won't be working on my Do Less goal. How do I pause it temporarily?
- How do I get rid of extra safety buffer on my Do less goal?
- Sample Do Less goal creation
Do Less goals are a feature of the premium subscription plans. While you want to be above the bright red line on a Do More or Odometer goal, you need to be below it on a Do Less. If you're trying to wind down a bad habit, Do Less goals might be the goal type you want.
That said, Do More goals can be turned to the same effect: for example, if you want to quit smoking, you would have a rate of 1/day and add +1 whenever you manage a day without doing the thing, or under the acceptable threshold for the thing. You could also give yourself a bit more leeway, like only having to meet the goal five times a week, by setting a rate of 5/7 a day on your Do More goal. It can be easier to manage a Do Less goal conceptually, though, since it functions in units rather than days-of-not-doing-the-thing.
If you're looking for information on Pessimistic Presumptive Reports, you can check below for a quick overview, or take a look on the dedicated page for the details.
When should I use a Do Less goal?
Use a Do Less goal for things you want to limit. You might still want to do it sometimes, but you want to do it less often, or restrict the amount of time you spend on it.
Common examples: eating sugar, smoking, spending time online, oversleeping, watching TV, drinking coffee, engaging with internet trolls, nailbiting, spending money, using profanity, reading political Twitter, eating in general...
What if I NEVER want to do something?
Technically, you can use a Do Less...
But we strongly recommend that you use a Do More goal to Not Do Something at a rate of 1/day. (More of our reasoning on the blog.) Users have reported finding Do Zero goals less motivating and harder to manage. You lose out on any extra motivation from watching the graph build over time. The goal just stays a boring flat line, and any lapses are really obvious, as in the second graph below (the images are from a slightly older style of graph, but the new ones look much the same in this situation!).
So instead of making a Do Less goal to eat 0 potato chips, you could make a Do More goal to spend a day without eating potato chips, 7 days a week. Every day you succeed at your goal, you'd enter a +1, and stay on the bright red line! The choice is yours.
How should I enter data for a Do Less goal?
Beeminder needs to know how much you did that day. Behind the scenes, it adds up all your datapoints to show you how much you've done since starting the goal.
Let's say I have a goal to drink less coffee — at most 4 cups per week, to be exact. I drank 0 cups on the day I created my graph, I submitted a 0. The second day, I drank one cup and submitted 1 to my graph. The following day, I've abstained again, so I submit a 0. And so on.
After those three points have been submitted, the graph will look like this:
I'm below my bright red line — doing better than my goal rate! Cool. And Beeminder's keeping a running total of all my progress for me, so I know I've only had 1 cup of coffee since starting my goal.
What happens if I never enter data?
With a Do More, if you abandon the goal, you'll eventually go off the bright red line and derail. But as you might have realized already, the Do Less goal has no power over you if you don't actually use it.
See how when the user didn't do anything on this old Do More goal, it derailed a bunch? But not entering data on a Do Less goal just gave them a ton of safety buffer, and doesn't really say anything about what they were doing during that long gap.
That tended to utterly destroy the power of Do Less goals, except for the extraordinarily fastidious. So we came up with the pessimistic presumptive report (PPR). You can read all the details over on that page, but a PPR is a datapoint Beeminder automatically enters if you don't enter one yourself. Given enough time, the PPRs eventually cross over the bright red line and derail you. This helps keep the goal effective: as the data climbs nearer and nearer to the bright red line, Beeminder will start sending you more and more frequent reminders about the goal, which will hopefully remind you that you wanted to stop doing that thing!
Here's a goal where the user was pretty good about entering data for the first few weeks. But then she fell off, and there have been enough PPRs added that she's approaching her top limit...
PPRs will make sure you can't just walk away without penalty!
Why is my Do Less goal going up, when I want to be doing it less?
The Do Less goal is graphing the cumulative number of times you've done that thing since the goal began. In most cases, you can't undo things once they've been done (e.g., can't unsmoke a cigarette, can't uneat a pint of ice cream), so that number will always be 0 or increasing. The goal is to make sure it increases more slowly than the bright red line, so that you stay below the limit and avoid derailing.
I'm going on vacation and won't be working on my Do Less goal. How can I pause it temporarily?
For a Do Less goal without automatic data, all you need to do is make sure the PPRs are turned off, and then enjoy your vacation! If no data is entered while you're away, you cannot derail. You can get rid of any unwanted safety buffer when you return, or enjoy your new allowance.
How do I get rid of extra safety buffer on my Do Less goal?
Use the Ratchet section in the Commitment tab below the graph to choose the number of units of safety buffer you want, then click Ratchet!
There is a small difference from all the other goal types, which use days of safety buffer, rather than units. Days of buffer are a bit of an illusion for Do Less goals, because you might be able to use up all your buffer in 1 day, no matter where you started. So we just let you decide exactly how many units should be left after the ratchet. For instance, here I have +11 cups of buffer, so I could drink 11 cups today. If I want to reduce that to 2 cups of coffee allowed today, I need to enter 2 in the box and then click the button.
Sample Do Less goal creation
- Head to create a new goal (also accessible through the New Goal link in the top menu).
- Click the + icon to start a new manual entry goal.

- Select Do Less as your goal type (because you want to Do Less of something).

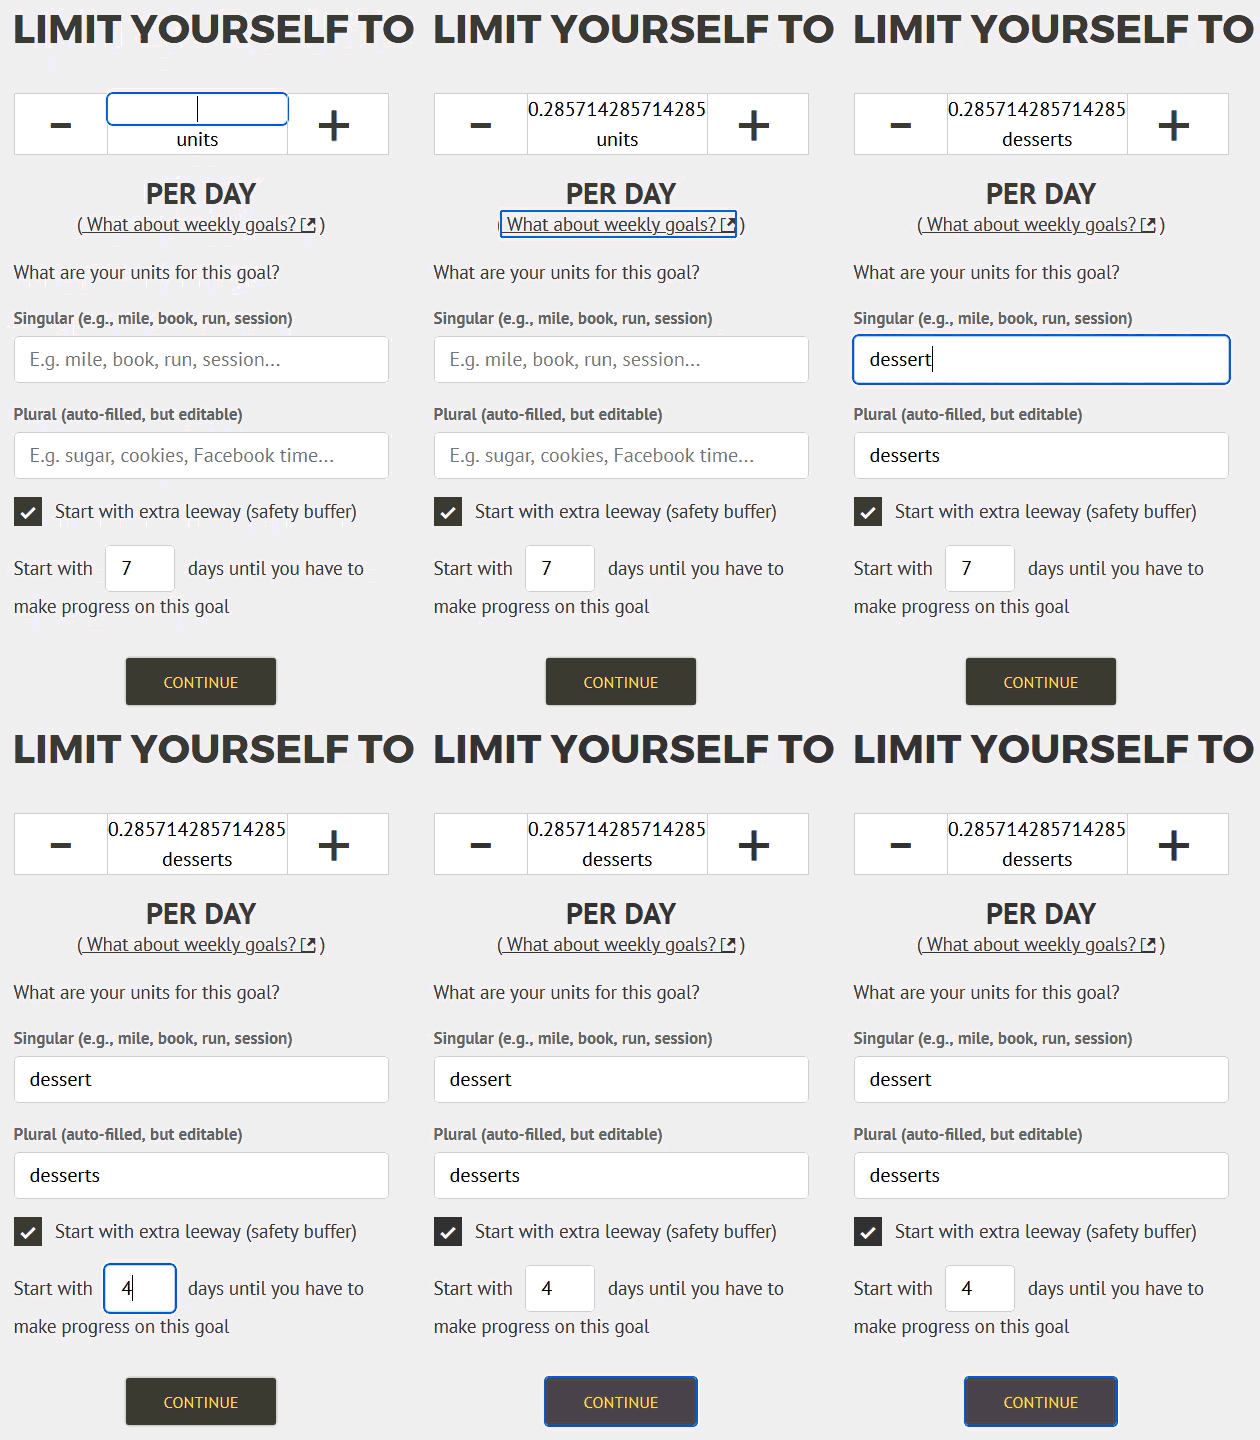
- Enter the units you want to use and the amount you want to commit to. In this example, I'm aiming to only allow myself a sweet dessert twice a week, so the daily rate is 2/7. Beeminder auto-calculates this as in the screencap below.
To start with a bit of buffer to begin with, enter that in the last field. Say I want to have a dessert tonight, that needs roughly half a week's allowance, so I'll give myself four days of buffer.

- Give your goal a brief name. If you want, you can also write a short description with more information.

- Finally, choose your initial pledge. This is the amount you will pay the first time you derail on the goal. After derailing, the pledge will increase by default — use the dropdown below to control how high it goes by selecting the cap. In the example below, I have chosen to start at a $5 pledge, which will increase each time I derail, until it reaches $270 — the pledge cap. (To read more about pledges and payments, check out some FAQs!)
If you want to start out with a sort of trial period, you can choose to start the goal at $0. If you do that, the pledge will automatically increase to $5 after seven days. If you derail before that, it will also increase to $5.

- Step through the preview and confirmation steps, and your graph will be created. Now I can have one dessert today!

With a Do Less goal, sometimes you want to plan ahead. If I have a dessert tonight, can I have one on Sunday when I'm out for dinner with the family? For that, check in the statistics tab for the Hard Cap By Day table:

The delta column is the easiest place to look once the goal has a little data (since then the cumulative total might be less intuitive and useful to you). I'm allowed only +1 today, tomorrow and Saturday (so if I enter +1 today, I won't be able to have dessert tomorrow or on Saturday), but between now and Sunday I can have +2 -- meaning I can have that lemon meringue pie on Sunday even if I have ice cream tonight. Result!
Related Reading
Keywords: do-more goals vs do-less goals, pessimistic presumptive reports (PPRs)
.png)


